
One of my all time favorite techniques is a light water distressing trick that I do. It's very simple and all you need is a glass of water and a q-tip or two. Here is a recent layout of my daughter that I did using water distressing.
I mainly use this technique around the border of my paper, but you can do this on every layer that you use. For this layout I used Pure and Cheeky from the May Ella collection along with Chic from the Just Add Color collection.
To get this look follow these simple steps:
1) Distress your edges with your favorite distressing tool or the edge of scissors.
2) Ink your edges in your choice of color and ink.
3) Dip your q-tip in your water and begin running it along the edges of your paper. Do this enough to saturate the edges and let your ink run a little.
4) When I layer my papers I always try to scrunch up the edges so that the other layers show and crinkle together.
5) Go over your edges again with an ink blending tool.
** Added flair: I used some glitter paint to enhance my edges even more.

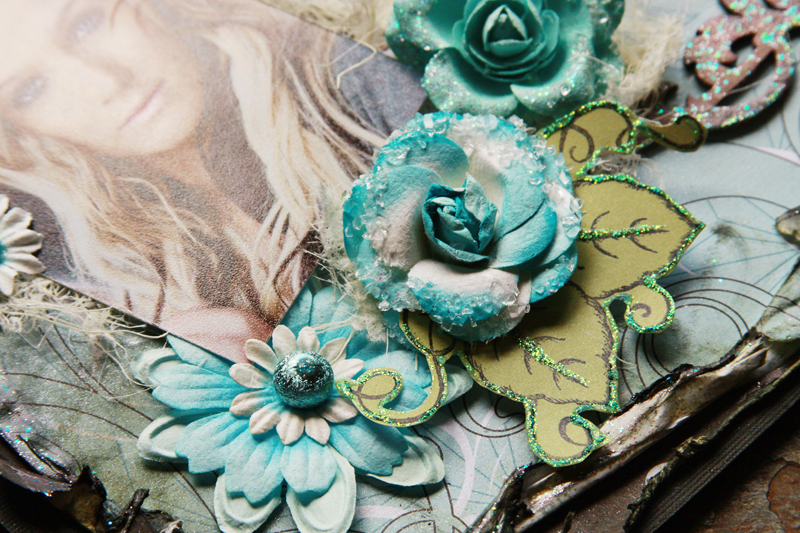
Here are some close-ups of the layout.


I based this layout on a sketch made by Charlotte! Thanks for stopping by Urban Swank!! Come back soon!!

Absolutely stunjning ♥♥♥!!
ReplyDeletewhat is a q-tip???
So gorgeous!!!
ReplyDeletePetra a Q-tip is a cotton tipped swab. Mostly used for cleaning ears.
http://www.qtips.com/
Uhooi,,
ReplyDeleteWow,, This card is very nice, beautiful and creative,,
Uhooi.blogspot.com
Stunning project! Love the distressing. TFS
ReplyDeleteThis is just fabulous!!! Love your technique and thank you for sharing!!!
ReplyDeleteOMG!!! gorgeous!!!
ReplyDelete